
Create a sprint plan
A plan pairs one Jira sprint with the people working on it and the rules for reading their estimates. You create one plan per sprint.
Before you begin: You need the Administer projects permission on the Jira project, and a sprint that has start and end dates set in Jira.
Open plan setup
- Open your Jira project and select Board Planning in the sidebar.
- Select New plan, or Start capacity planning if this is the project's first plan.
Choose the sprint
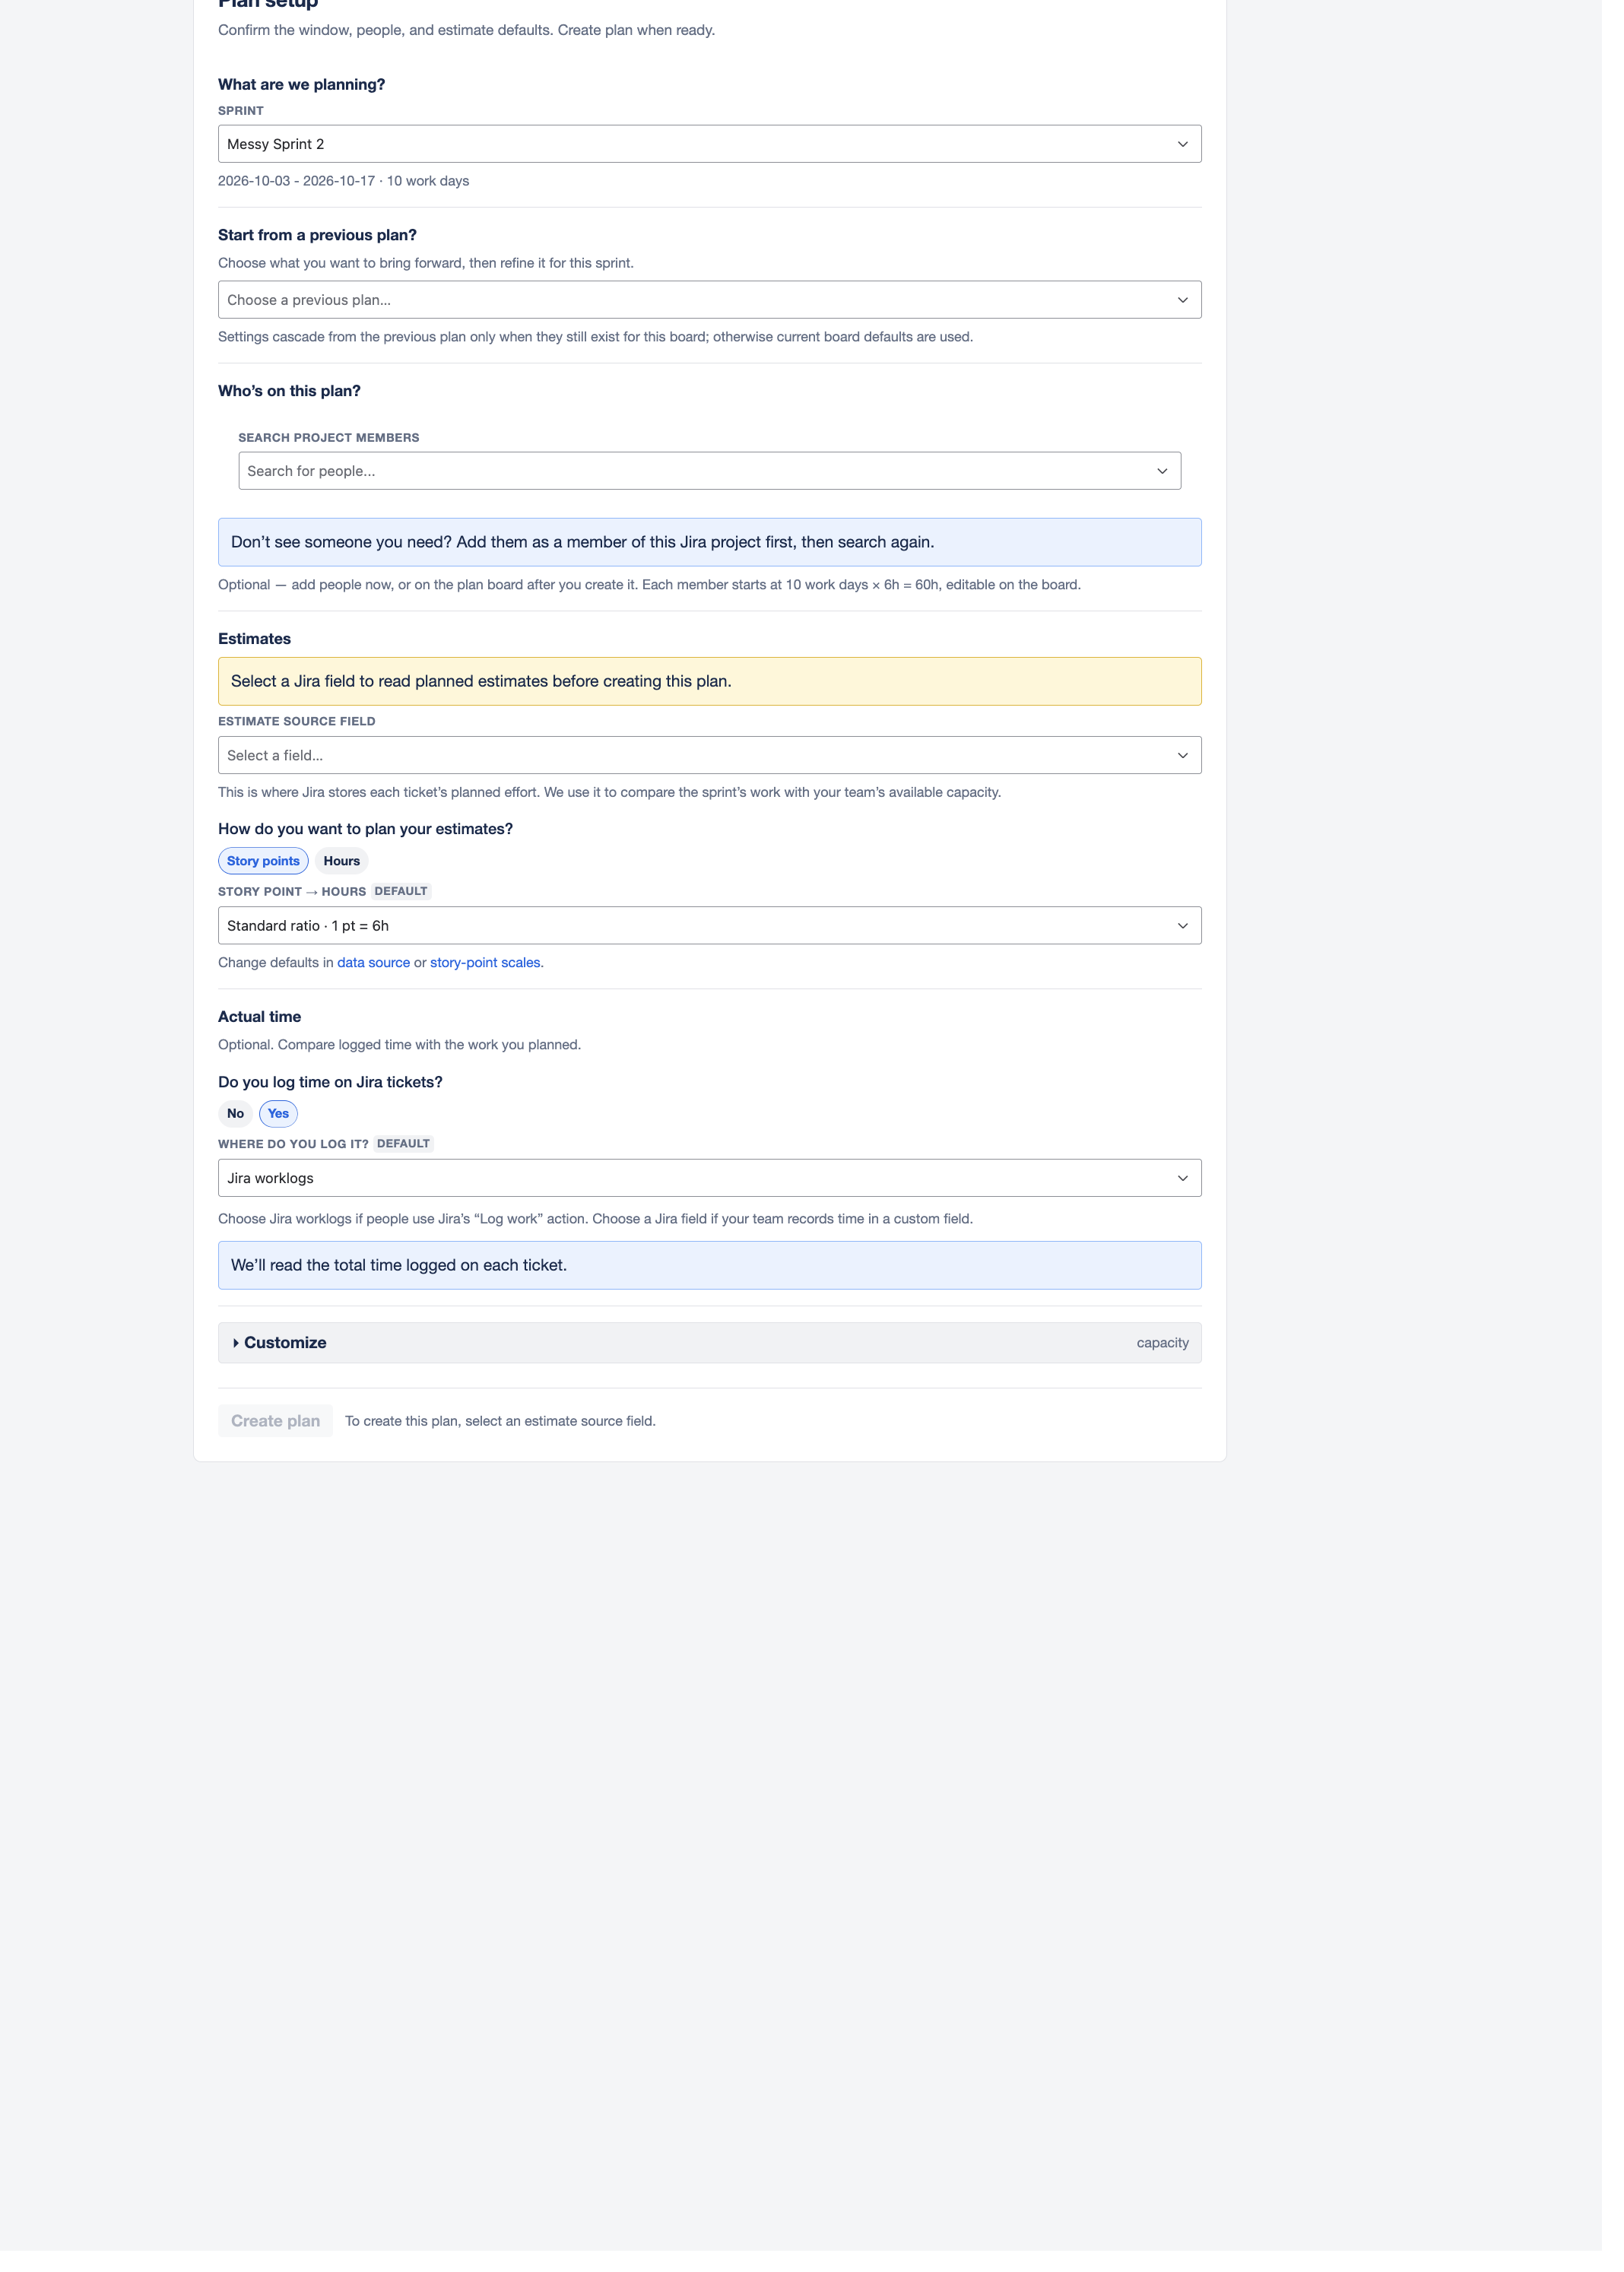
Under What are we planning?, pick the sprint from the Sprint list. Its date range and work day count appear beneath.
Two sprints cannot be planned, and Capacity Compass says so rather than letting you get to the end and fail:
- A sprint with no dates. Capacity is counted in work days, so the sprint needs a start and an end date in Jira. Set them on the sprint, then come back.
- A sprint already under way. If it has been running for more than a day, or has ended, you cannot plan it. A capacity plan records what the team committed to before the work started. Choose an upcoming sprint instead.
Reuse a previous plan
If the project has earlier plans, a Start from a previous plan? section appears. It copies the team and the meetings forward so you are not rebuilding the same plan every fortnight. See Reuse a previous plan.
Add people
Under Who's on this plan?, search by name and select each person.
Search only returns members of this Jira project. If someone is missing, add them to the project in Jira first.
Adding people here is optional. You can do it on the plan board afterwards. Each person starts with the plan's work days multiplied by its hours per day, and you can change that per person later.
Set up estimates
The Estimates section decides how Capacity Compass reads the work in your sprint.
Estimate source field
The Jira field holding each issue's planned effort, usually Story Points. If your board has a default, it is filled in and tagged Default.
This field is required. Without it there is no way to know how much work the sprint holds.
Story points or hours
Choose how you want to read estimates.
- Hours: the field's value is taken as hours directly.
- Story points: Capacity Compass converts points to hours using a scale you pick in Story point → hours.
Capacity is always measured in hours either way, because time off and meetings are not measured in points.
Your board ships with three conversions, and you can add your own in board settings:
| Scale | How it converts |
|---|---|
| Standard ratio | 1 point is 6 hours |
| T-shirt sizes | S is 3h, M is 6h, L is 12h, XL is 20h |
| Fibonacci | 1 is 1h, 2 is 2h, 3 is 4h, 5 is 8h, 8 is 13h |
If an issue's points are not in the table, Capacity Compass estimates a value between the nearest entries and marks it with an asterisk.
Set up actual time
The Actual time section is optional. It lets Capacity Compass compare logged time against what you planned.
Answer Do you log time on Jira tickets? If you select Yes, choose where the time lives:
- Jira worklogs if people use Jira's Log work action.
- A Jira field if your team records time in a custom field.
Selecting No is fine. Planning works without it. You lose the delivered time comparison and the estimate accuracy view in Track how your sprints are going.
Change the default hours
Select Customize at the bottom to open Default hours. Hours per day is the productive hours one person works per day, and it seeds everyone's starting capacity. The board default is 6.
Create it
- Select Create plan.
The plan board opens.
If Create plan is unavailable, a line beneath it lists every reason. The possible reasons are a sprint that has already started, a sprint with no dates in Jira, no estimate source field, and no story point conversion.
Nothing is saved until you select Create plan. If you navigate away first, Capacity Compass asks whether to discard the setup. Leaving loses it.
Rename or delete a plan
On the plan board, select Edit name beside the title to rename it, then Save name.
To delete, select Delete plan at the top right and confirm. This removes the plan and its capacity setup. Your Jira data is not touched.